School Days 2025
Now in its third year, School Days is about more than pencils and backpacks, it’s


We just love Christmas at Stripey Stork, not least because it’s when we have our biggest campaign of the year – Santa Stork. What’s going to make Christmas even more special this year is our invitation to take part in the Reigate Christmas Tree Festival. This community event sees many local organisations and community groups displaying their personalised Christmas trees, whilst raising money for charity. A hall full of twinkly and unique Christmas trees would even get Scrooge in the Christmas mood. As Team Stork never miss an opportunity to get creative and be at the hub of our fab community, we’ve jumped at the chance to be involved and we hope you and your children will too!
With half term upon us and Christmas spirits running high with the recent launch of Santa Stork, we thought now would be the perfect time for those Christmas craft activities. We encourage all of our ‘storklets’ to get involved in making decorations for what promises to be the best Stripey Stork Christmas tree yet, something for us all to be proud of and which truly represents what Stripey Stork is about. So, we are thinking lots of orange and turquoise (forget the standard red and green Christmas colours), our mascot Stripey, recycling, children and babies. What comes to mind when you think of Stripey Stork and how can this be represented in a Christmas tree decoration? If you have an answer to this, then get crafting!
The Christmas Tree Festival is being held at the Reigate Community Centre (High Street) on:
We’d love to see as many of you there as possible, enjoying Stripey’s tree and all of the other fantastic trees on display. We are also one of the chosen charities being collected for this year, so do come and show your support. In order for us to have our tree Christmas-ready and for it to be enjoyed in its full glory at our offices, we ask that you drop your decorations off at our HQ by Friday 23 November. Here’s some inspiration to get you started.
Thank you to Dylan (age 9) for inspiring us with this fantastic Quixels version of Stripey. So, it got us thinking, this would look great turned into a Christmas decoration.
We made versions using Hama beads (iron well on both sides to make sure that the legs stick together), plastic canvas and cross stitch.
What other materials can you make Stripey from? Here’s a pattern you may want to use.
We love books here at Stripey Stork, in fact we try to include a bundle of age appropriate books for every child we help as we recognise how important they are for development. If you have books at home which are too well-loved to pass onto a new family, then why not make them into decorations and give them a different purpose?
Using an old annual, we made some origami lucky stars. Simply cut the pages into strips about 1 inch (2.5 cm) wide, stick them together with tape to get a long strip about 22 inches (55cm) long.
This tutorial shows you how to fold it into a 3D star shape. Adults may need to help here as it’s a little fiddly, but well worth the effort.
Once you’ve made your star, use a needle and thread to add a hanging loop through one of the star points. Beads can be added to the hanging loop to add some extra sparkle.

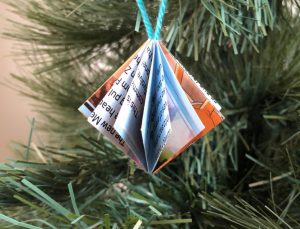
Here’s a tutorial for making different shaped baubles from book pages, where you can choose squares (like we have here on the right), circles or stars. And here’s another tutorial for making a different type of star. Who’d have thought you could do so much with just some old books?
Felt decorations can be nice and easy to make. For a traditional Christmas icon (snowman, holly, present etc.) all you need is the outline of the shape, you’ll be able to find lots of templates online – clip art is always a good source. Stick to simple, unfussy, designs.
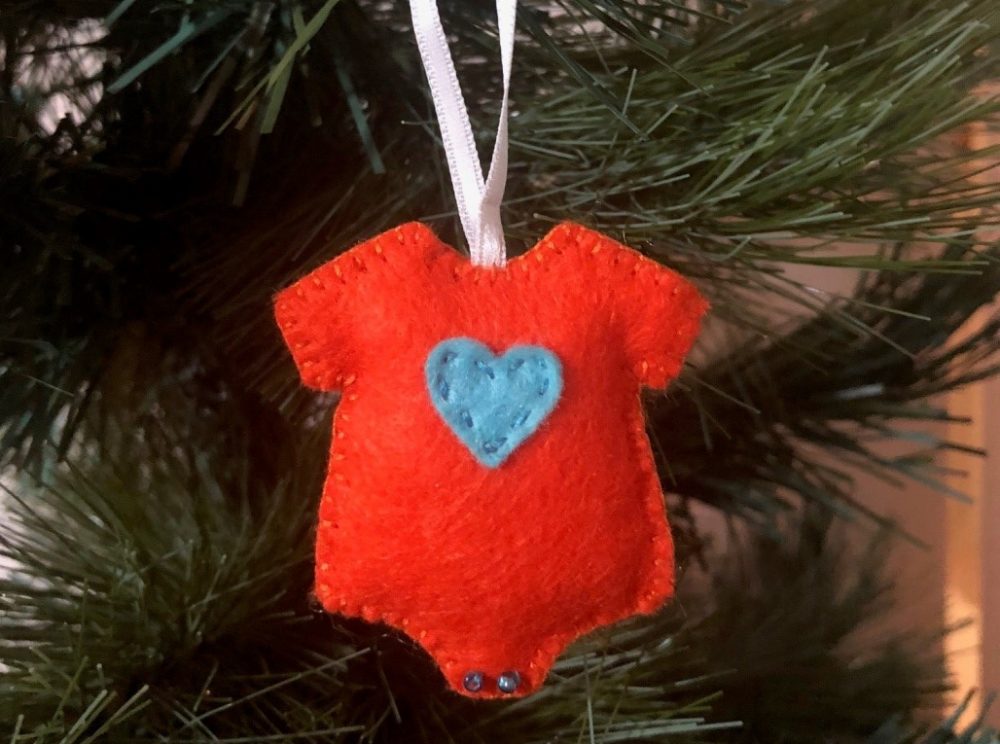
If you want to make something more bespoke, you may need to design your own. For example, we wanted to make a baby vest decoration (orange and turquoise of course) to represent all of the bags of clothes we give out at Stripey Stork. Did you know that last year we gifted 633 clothes bags to local families in need? Using a piece of paper, fold it in half if the shape is symmetrical, draw the outline and cut it out. Then cut out two layers of felt using the shape as a stencil.
Decorate the front with embellishments, buttons, beads, ribbons and/or bells (we particularly like bells as they jingle). Pin the front of the decoration to the back. At this stage add a ribbon loop to hang on the tree later. Sew the front of the decoration to the back using either a double strand of sewing or embroidery thread. Just before you get to the end of the stitching, add a little stuffing. Then voila, finish off and it’s all ready to hang on the tree.
Did you know that last year alone we donated 376 toys and book bags? And that’s not even including Santa Stork! At Stripey Stork we make sure every preloved puzzle that we pass on is complete, otherwise imagine the disappointment for a child when they get to the end of the puzzle only to realise that there’s a piece missing! These incomplete puzzles make great Christmas decorations.
Simply paint the puzzle pieces a colour of your choice (no pressure, but orange, blue and yellow are our firm favourites here), glue together in a snowflake shape and add a ribbon. We recommend adding some Christmas sparkle with embellishments or glitter. A little tip – we found it much easier to paint the cardboard back of the puzzle pieces, not the shiny front.
Have a think about other toys you could use? We thought some old, battered toy cars painted orange would look great.
At Stripey Stork we get so many great donations, but occasionally some of the clothes don’t pass our quality checks. We always like to say that if it’s not good enough to pass onto a friend, then it’s not good enough to pass onto any of the families which we support. We want our recipients to feel like they are receiving a gift and not a hand out.
So, if you have any baby clothes which are at the end of their life, then give them another life. Like we have here, by making mini fabric Christmas trees using this tutorial.
Other ideas for using fabric scraps can be found here and here.
If you are short of fabric, then you can always swing by our office (after half term of course), and we’ll be happy to help you out.
 rafting begin…
We hope you’ve enjoyed our designs. If you have any ideas of your own then please share them in the comments below. One of our volunteers (Sam West) has already been busy as you can see.
Now, all you need is a day chilling at home and it’ll be the perfect excuse to set to work. We can’t wait to see all your creations on our Stripey Stork tree, we know you’ll do us proud, you always do! And don’t stop at our tree – make some keepsake decorations for your own tree too, and let us know how you get on.
Speaking of keeping the kids entertained, here’s our Stripey Stork colouring sheet too for them to enjoy this half term.
Now in its third year, School Days is about more than pencils and backpacks, it’s
This week, the Joseph Rowntree Foundation released their annual report into poverty in the UK:
Did you know you can support Stripey Stork by donating shares? Donating shares is a
As the sleigh bells fade into the distance and Santa and his reindeer head back