Stripes4Stripey 2026: A Day of Colour, Community and Support
On Thursday 18th June, our annual Stripes4Stripey campaign returned with our community coming together to


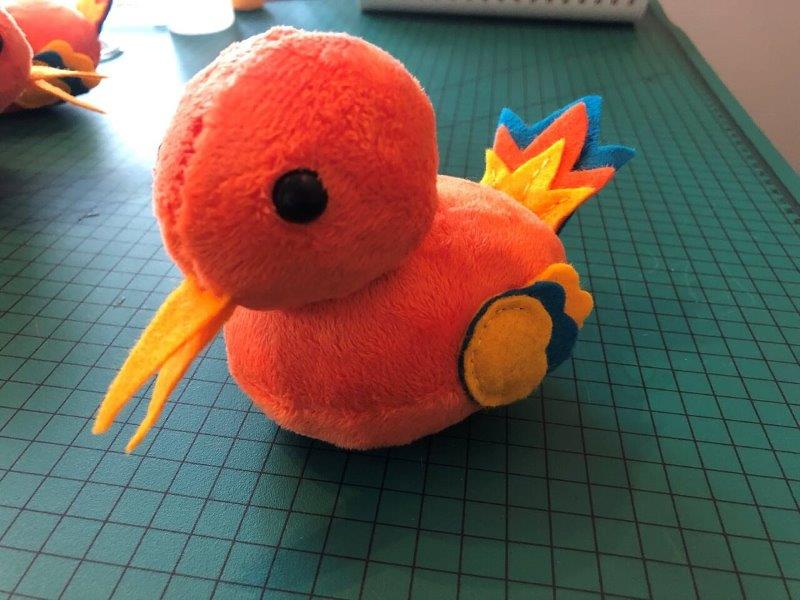
Jenny, our Treasurer and creator of Stripey the mascot, has surpassed herself yet again with these adorable Stripey chicks. Team Stork are in love with these little babies, so Jenny has kindly provided us with some instructions on how to make your own – it’s easy and the kids will love to lend a helping hand in bringing their own chick to life.
The first thing to remember is that chicks never look exactly like their parents, so you can take some elements of adult Stripey but ignore others. My chick is legless (say no more!) which is way easier than sewing stripey legs and feet. I’ve also got rid of the neck and changed the tail so that it is spikier than adult Stripey. But because I’ve used the same colours as adult Stripey there is no mistaking who their parents are.
Loads of other variations are possible, a fluffy chick in orange fur fabric would be adorable! All of these ones have different personalities depending on where I have put the head, exactly how the fabric has stretched etc.
Step 1
Using this pattern (or create your own) cut out 2 large circles (mine were about 11.5 cm diameter) from the orange fabric and two smaller ones (mine were about 9cm diameter). Put them right sides together and sew round the edge, either by hand or with a sewing machine, with a seam allowance of about 5mm, making sure you leave a gap for turning. Leave a slightly bigger gap in the head if you are going to put in toy safety eyes. Turn the head and body the right way round though the turning hole. My fabric had a one way stretch in it. When I put the circles together I made sure that it stretched in the same direction then when I stuffed it turned the circle into an oval.
Step 2
Next stuff the body and sew the turning hole closed with a ladder stitch. If you are using safety eyes (I used 10mm black safety eyes) stuff the head temporarily which will enable you to find a good position for the eyes. Then remove the stuffing, put in the eyes and restuff. Close the stuffing hole in the head with a ladder stitch and then sew to the body. If you don’t have safety eyes, you could use buttons or circles of felt, sew these on after the head is stuffed.
Step 3
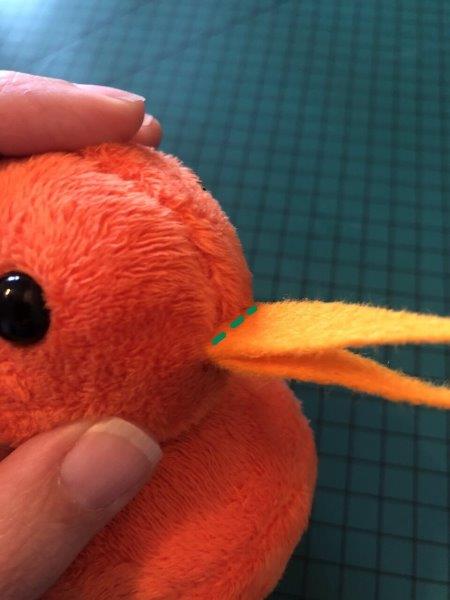
Cut the beak out of yellow felt, fold in half and sew to the head at the fold (dashed green line in photo).
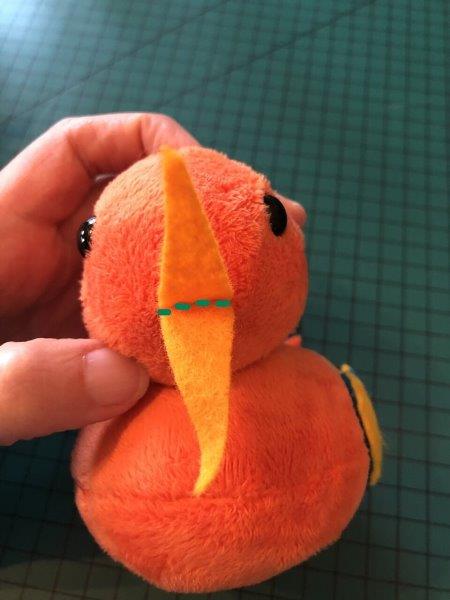
To stop the beak flapping wide open, hold it closed and sew a few stitches near the head (see dashed green line below).
Step 4
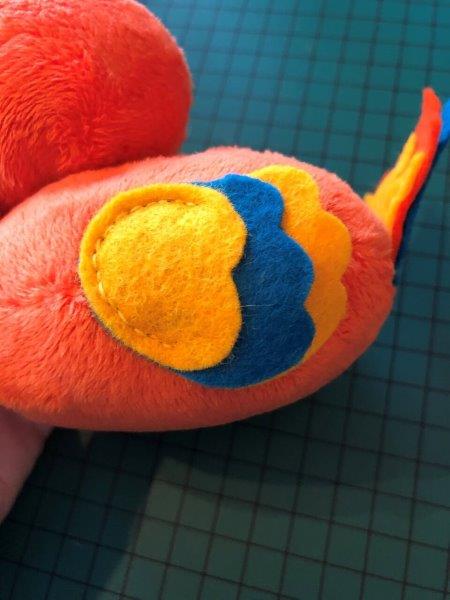
Cut the wing pieces out of felt, sew them together and then sew to the body. I’ve only used stitches around one edge of the wing.
Step 5
Similarly for the tail, sew the pieces together first and then sew to the body.

That’s it, your Stripey chick is complete, all ready to welcome into your family!